One of the most exciting (and sometimes excruciating) parts of planning a magical Disney vacation is the mounting anticipation of counting down the days left until the big trip. This summer, our family is looking forward to a “land and sea” extravaganza, including a 5-night Bahamas cruise aboard the Disney Dream and a 5-night stay at Walt Disney World. So suffice it to say – the pre-vacation anticipation is currently at an all-time high in our house!
In preparation for our upcoming trip, I decided to get creative and try my hand at a Disney-inspired craft to help pass the time. Those of you lucky enough to have sailed aboard the Disney Cruise Line (DCL) might have noticed that many families choose to decorate their stateroom doors with fun magnets celebrating their unique personalities and love of all-things-Disney.
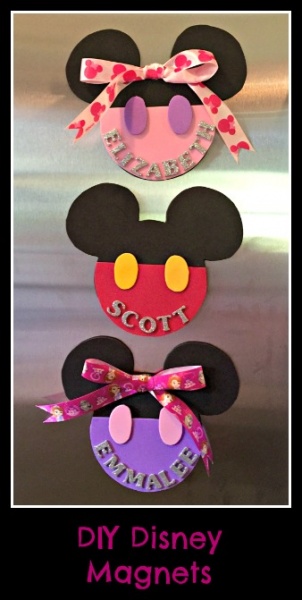
After seeing all of the creative stateroom doors on our first DCL cruise, Scott decided that we just had to get in on the fun this summer. So this was the perfect opportunity for me to get crafty and make my own Disney-inspired magnets for the family. This craft was extremely easy and quick to make, and the magnets turned out great (they’re currently enjoying a starring role on our refrigerator as we continue to count down the days to our cruise).
To make your own personalized magnets (for an upcoming cruise, a handmade gift for a Disney lover, or even to spice up your own fridge), follow these simple steps:
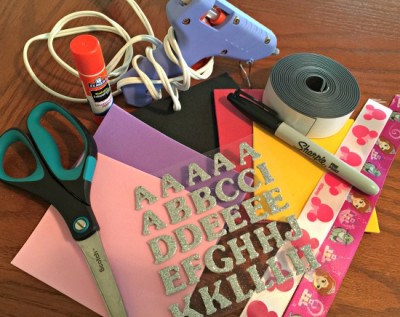
Supplies:
- 3 Sheets of Craft Foam in your favorite colors
- For the “Mickey” magnet, I used Black, Red, and Yellow foam
- For the “Minnie” magnets, I used Black, Pink, and Lavender foam
- Scissors
- Permanent Marker
- Glue Stick (or use adhesive backed foam)
- Hot Glue / Glue Gun (optional, for Minnie magnets)
- Adhesive backed magnet
- Ribbon approximately 1” thick (optional, for Minnie magnets)
- Foam alphabet stickers
- Ruler (optional)
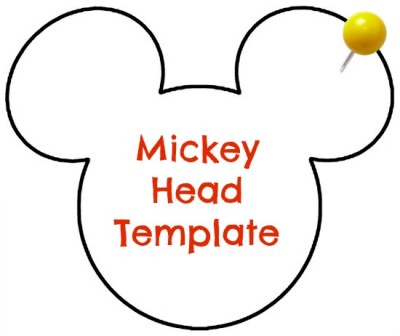
- Using a permanent marker, draw a Mickey head shape onto the black craft foam. If you’re not confident in your free-hand drawing abilities, there are several Mickey head templates available online, which can be printed and traced. Just search for images by “Mickey head outline.” Note: This will be the base of your magnet, so be sure to draw the Mickey head to the desired size of the finished magnet
- Cut out the Mickey head shape from the black craft foam.
- Using the permanent marker, trace the bottom half of the black foam Mickey head onto the 2nd color of craft foam (stopping just below the ears). Use a ruler or other flat surface to draw a straight line across, creating a half circle.
- Cut out the half circle from the colored craft foam.
- If you’re using adhesive craft foam, peel the backing from the half circle, and stick it to the bottom half of the black Mickey head. If you’re using standard, non-adhesive craft foam, apply the glue stick to adhere the half circle to the bottom half of the black Mickey head. Be sure to line the foam shapes up evenly before adhering them together.
- Using the permanent marker, draw 2 small ovals onto the 3rd color of craft foam. These will be the “buttons” for your magnet.
- Cut out the ovals from the colored craft foam.
- If you’re using adhesive craft foam, peel the backing from the ovals, and stick them to the Mickey head, so that the buttons are overlapping both the black top and colored bottom half of the Mickey. If you’re using standard, non-adhesive craft foam, apply the glue stick to adhere the ovals to the Mickey head.
- Use the foam alphabet stickers to personalize the magnet.
- If you’re making a “Minnie” magnet – cut your ribbon to the desired length and tie a bow.
- Use your hot glue gun to carefully hot glue the bow to the top of the magnet, centered between the ears.
- Apply the adhesive magnet to the back of your finished “Mickey” or “Minnie” head.
I hope that you had fun making this personalized craft, and that you enjoy your completed magnet as much as my family loves theirs!
If you followed along and made a magnet – how did it turn out? What’s your favorite Disney-inspired craft? We’d love to hear from you in the comments!
Incoming search terms:
- disney cruise magnets 8 in size
- how to make dcl door magnets


We’re going on a Disney cruise in a couple of months, and I’m trying to make your magnets for our stateroom door. I have one question: if you used foam board for all of the colors of Mickey and Minnie, is the front side of the magnet uneven (caused by layers of different sizes of foam board glued on top of each other)?