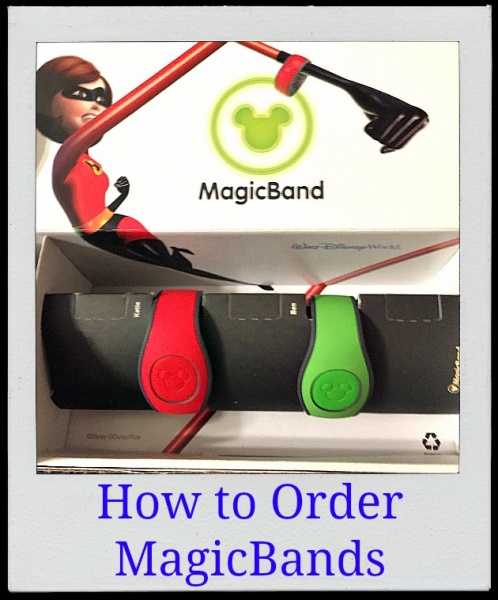
If you’re staying in a Walt Disney World Resort Hotel, one of the steps of planning your vacation is ordering your complimentary MagicBands! MagicBands are unique to Walt Disney World so you if you’ve never ordered them before (or if it’s been a while!) here’s a step-by-step tutorial.
MagicBands can be ordered through the My Disney Experience tab of the Walt Disney World website. You can also order them through the My Disney Experience app. Below is a step-by-step walk-through of each method to make the process easy for you!
Website
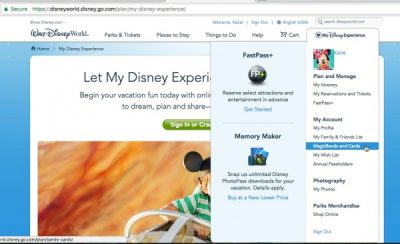
- First, visit the My Disney Experience section of the Walt Disney World website (here) and sign in to your account. (If you do not have a My Disney Experience account yet, you can learn how to create one here.) Once you’re signed into your account, hover over the “My Disney Experience” tab and select “MagicBands and Cards.”
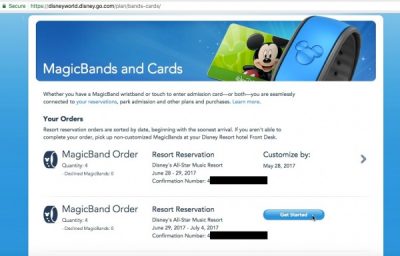
- Once you select the “MagicBands and Cards” option, you’ll see the screen below. This screen lists all of the resort reservations linked to your My Disney Experience account. (If you need to link a resort reservation to your My Disney Experience account, you can learn how to do there here.) Find the reservation that you want to order MagicBands for and click the “Get Started” button.
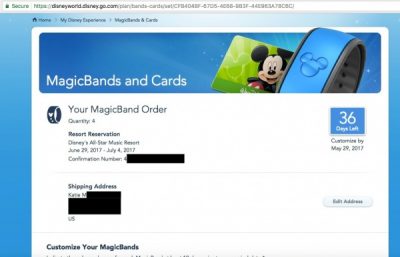
- After you click the “Get Started” button, you’ll want to confirm that the shipping address in your MagicBand order is correct. If you’re customizing your bands more than ten days in advance, your MagicBands will be shipped directly to your house! If your vacation begins in less than ten days, your MagicBands will be at your resort when you arrive.
- Once you’ve confirmed your shipping address (or updated it), scroll down the page and you’ll see each member of your party listed. Next to each member of your travel party you will have the option to customize your MagicBands!There are a couple of things to note here. First, every member of your party will get a MagicBand – even those that don’t need admission tickets. You can see in the picture above that my reservation is giving me four MagicBands, but our party consists of two adults and two children under the age of three. So, even though my kids don’t need admission tickets, they do get MagicBands. Second, if you have MagicBands from a previous trip that you prefer to use, you can choose to decline your MagicBands for your upcoming trip.
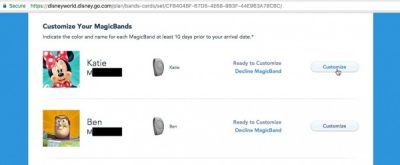
- After you click “Customize” the real fun starts! On this screen you can pick your MagicBand color and personalize it with your name (or nickname!). Currently there are eight colors to choose from so there’s something for everyone! You can also customize the name on your MagicBand using any name with up to nine characters.

Make sure to keep the name on your band Disney-appropriate or your request is likely to be ignored.
My Disney Experience App
If you prefer, you can order your MagicBands through the My Disney Experience app. The screenshots below are from the iPhone app, but the app is similar on all platforms.
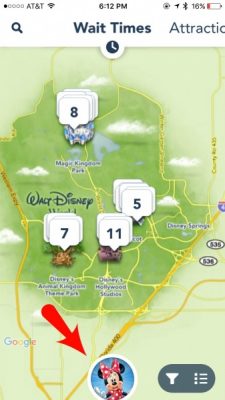
- When you open the My Disney Experience app, you’ll see the main screen (below). From here, click on your personalized character at the bottom of the screen.
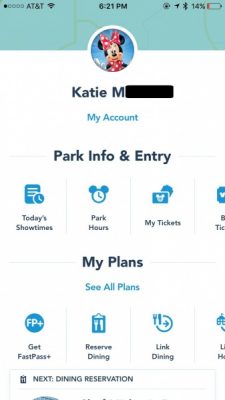
- Once you click on your character, you’ll see the screen below. You’ll want to scroll down until you can see your upcoming plans. Advanced dining reservations will be listed first, followed by upcoming resort reservations.
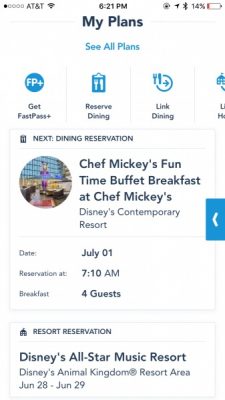
- Once you see your upcoming resort reservation, click on it. Note: at the moment I can only see one upcoming resort reservation in my My Disney Experience app, even though I have four listed on the website. So if you’re trying to order MagicBands for multiple upcoming trips, you may need to do so on the website instead.
- After clicking on your resort reservation, you’ll see several options on your screen. Click on “Choose MagicBands.” After you click here, you will be re-directed out of the My Disney Experience app and into the mobile website.
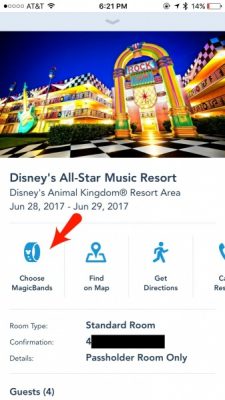
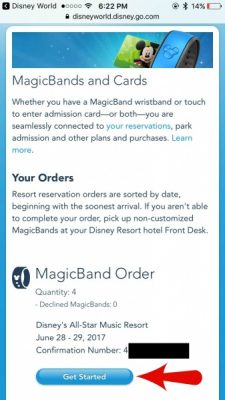
- From this step on, the process is very similar to what you’d see on the website. On the first screen you’ll see your resort reservations listed and you’ll click “Get Started” on the reservation for which you want to customize MagicBands.
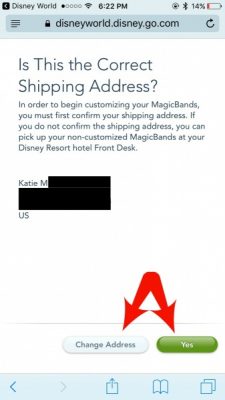
- When you click “Get Started” you’ll have to confirm (or update) your shipping address.
- On this screen, you can customize (or decline) MagicBands for each member of your party.
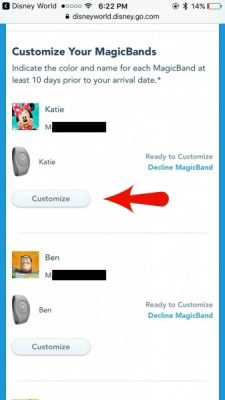
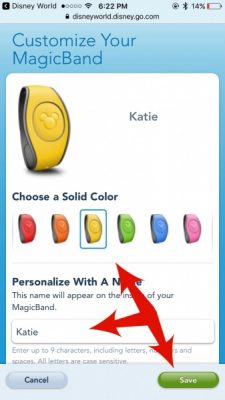
- Once you click “Customize,” you’ll be able to select a band color from the eight standard colors. You’ll also be able to personalize the name on your band with any name up to nine characters. So you can use your name, your nickname, your favorite Disney character, or whatever you want (as long as it’s Disney appropriate)!
It’s that simple! Ordering (and receiving) MagicBands is one of the most exciting things to do prior to your trip. It’s hard not to be excited when that white box arrives in your mailbox!
Did you like this article? Make sure to share it with your friends! Check below for easy ways to share!
Incoming search terms:
- https://www themouseforless com/blog_world/how-to-order-magicbands/
- how to order magic bands
- https://www themouseforless com/blog_world/how-to-order-magicbands/#:~:text=Next to each member of dont need admission tickets
- https://www themouseforless com/blog_world/how-to-order-magicbands/#:~:text=MagicBands are unique to Walt the My Disney Experience app
- how to order customize magic bands disney
- how to order magic band
- how to buy a disney magic band on mobile app
- how to order magic bands from app
- how to order magic bands on disney app
- where to purchase magic bands on my disney experience app
