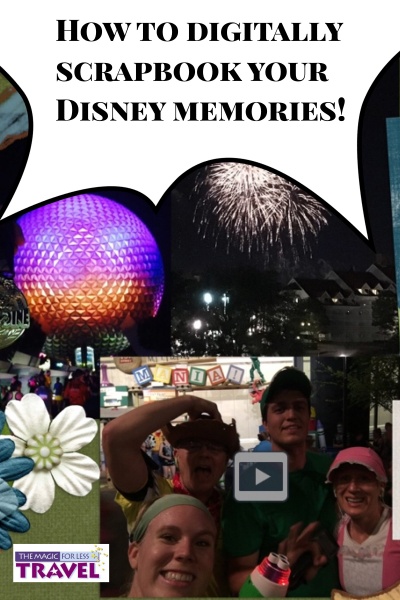
Today we would love to introduce you to how we digitally scrapbook our Disney memories!
If your family is like mine, we love going to Disney because it is a place where magical moments happen. Our family loves capturing those moments in photos and videos to look back on years later and make us smile. My parents have tons of photos and videos from when I was growing up that we can now build on for our own family.
Photopass and Memory Maker are great ways to help capture these memories. However, with the introduction of videos into these packages and the hundreds of incredible photos we got to take home, the regular books you can make via sites like Shutterfly or Adorama Pix start to get really expensive. Plus, how are you supposed to get videos on a piece of paper? We unfortunately don’t have Harry Potter moving photos…
So a couple of years ago I ventured out in engineering a way to make an electronic scrapbook as a way to take our Disney memories with us on our iPads, iPhones or computers. It’s a place where photos and videos can live in harmony and you don’t have to pick and choose between all your great and wonderful photos because your pages are limited by cost.
A couple of disclaimers:
- I only know how to do this on a Mac computer. I know there are Adobe products that would let you make similar ebooks on PCs. However, since I do not make my books this way, I thought it would be irresponsible to try to explain the process and most likely lead you, the reader, astray.
- This is not going to be a super technical blog post. I will not go into how to use Photoshop to manipulate photos or elements as there are several (thousand) youtube tutorials on this. What I will be doing is showing you what apps I use and the process I go through to create the final product.
If you would like to watch a video tutorial instead of read the steps, you can do that by scrolling down to the bottom of this page and watching the embedded tutorial there!
Let’s get started!
The apps I use:
- Safari
- Keynote
- Photoshop
- iBooksAuthor
- iMovie (if I have a series of videos I want to add to the page, which I do not for this particular example).
Step 1: Organize your photos.
You need to pull together all your photos. Get your photos off your phone, your significant other’s phone, your mom’s phone, your dad’s phone…you get the picture (pun intended). Also, download your Photopass photos if you purchased that package and make sure you have any photos or videos you might have taken on external devices. I personally scrapbook chronologically so I then organize all my files by date.

Step 2: Decide what digital scrapbook kit you want to use.
I found a great subscription called The Daily Digi that features different artists each month that create kits for digital scrapbooking! For about $8.00/mo you get 6-8 kits with some bonus items. I have used this service for a couple of years now and I never been disappointed with the kits I have received. You can find kits that are more specific to what you exactly want for the theme of your page. However, I mix and match so much it ends up not being a big deal to have a specific theme for me when I have great content right here.

Step 3: Open your Photoshop Template.
I created a Photoshop template that works for iBooks Author that simply 13.057 in wide by 9.513 in tall. Once this template is open, I add the photos and scrapbooking elements I want to use for the page in question.

Step 4: Resize and arrange your photos.
From there, I add and resize my paper that I want to use in the background. Then, I resize my photos and arrange them in a manner that makes me happy.

Step 5: Add and arrange your scrapbooking elements.
After arranging my photos, I then add my scrapbooking elements and arrange them to create the page. I tend to play with my elements a ton in this stage and will even rearrange the whole page if a spark of creativity hits me while moving around all the different elements.


Step 6: Add a journaling caption.
Usually, you want to add some journaling to explain whats going on in the pictures on the page. After all, the whole point it to relive memories. What happens if you forget whats going on in the picture?

Step 7: Add drop shadows to your page.
Adding some shadows to your photos and elements allows your page to have a little bit more of a 3D and realistic look as if it were actually paper elements. It’s a small touch that most people won’t notice, but it does add to the overall look of the page!

Step 8: Save your file as a Photoshop file.
This allows you to be able to edit it if you need to for any reason.

Step 9: Select anything you need cut out for widgets.
iBooks Author allows you to add widgets to your page like slideshows, videos, scrolling paragraph areas, pop ups and much more. The bottom photo of my family dressed up as Toy Story characters for the Wine and Dine Half Marathon is actually going to be the location of my slideshow widget where I can then show many more fun photos from our trip. But if I just add the widget to the page, it would cover up the scrapbooking elements I have currently going over my photo. To keep the look, I select the photo with the selection tool (usually by clicking outside the picture then telling the application to select the inverse).

Step 10: Merge layers and cut out your “window.”
Then I merge all the layers underneath that picture (and including that picture) to create a flat layer and then select “create a new layer via cut” in my layers menu up top. Hiding the layer created (that should just be where my picture was) shows a small “window” that I will be able to put my widget later.

Step 11: Save your file as a PNG.
Step 12: Open iBooks Author.
From there, you will want to go into iBooks Author. I give a tour in the video tutorial of this application if you are not familiar with it.

Step 13: Insert the PNG page you created in Photoshop.
Resize it to fill the whole page.

Step 14: Add the desired widget.
For this particular page, I wanted to create a slideshow of all my photos. I created a Keynote file with one picture per slide and then inserted the Keynote widget into my page in iBooks Author. I then told the application to add the appropriate Keynote file to the widget.

Step 15: Send the widget to back.
Notice that in the above picture, my widget was covering the scrapbooking elements that I originally designed to go over the photo. Sending the widget to “the back” then allows for my scrapbook page to not get covered up and my page now looks like I designed it in Photoshop!

Step 16: Publish your book!
When you have all your pages created and the book exactly the way you want it, you can then send your book to publish. I export mine to a hard drive disk (I have no desire to publish to iTunes) and then open the file in iBooks. There, all my widgets work where I can click through photos, watch videos and relive all my memories my family had!

I hope this was a helpful tutorial for you! If you have any questions, feel free to ask them in the comments below. I hope this will allow you to smile about your Disney trips years after they have passed by! As mentioned before, below is the video tutorial I created so you can watch me do this process from beginning to end!
Have you ever digitally scrapbooked your vacation memories? What tips do you have? Share them in the comments.
Did you like this article? Make sure to share it with your friends! Check below for easy ways to share!
Incoming search terms:
- https://www themouseforless com/blog_world/digitally-scrapbook-disney-memories/
- best online scrapbook maker fpr disney
- best way to scrap book disney


Thanks for the videos very helpful and your books are beautiful.
Sheryl Reiber