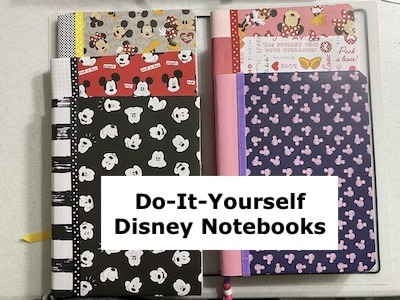
Here’s an easy, do-it-yourself Disney notebook project. Maybe you’re asking why it’s good to have a Disney notebook? Well, we’re at the beginning of a new year, and you may be planning a vacation to Walt Disney World, Disneyland, or another Disney destination. I previously wrote about adding a packing list or an itinerary to a travel journal when planning your Disney vacation. A travel journal does not need to be expensive. It can be accomplished in an ordinary notebook. Consider transforming that ordinary notebook into one that is fun and that can serve as a vacation memory.
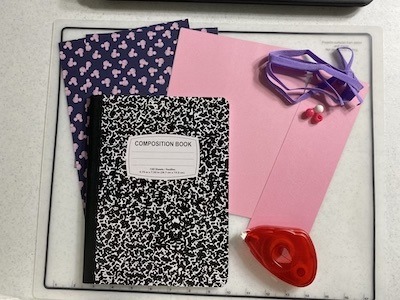
Supplies for a Do-It-Yourself Disney Notebook
- Composition notebook or any non-spiral-bound notebook
- 2 sheets of 8.5” x 11” Disney-themed paper (or plain paper decorated with Disney stickers, drawings, etc.)
- Note: a heavier grade paper, like scrapbook paper, is more durable and will prevent any ghosting of the notebook’s cover design through the Disney-themed paper
- 3 sheets of 8.5” x 11” coordinating plain paper and/or cardstock
- 3.5’ of coordinating ribbon
- Bookmark accessory (optional)
- Ruler
- Scissors or paper cutter
- Permanent tape adhesive (2-sided tape or a glue stick also work)
Directions for a Do-It-Yourself Disney Notebook
Cut Paper
- Measure the notebook.
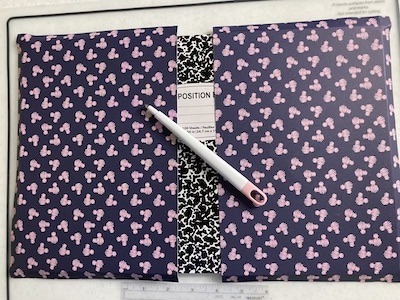
- Cut the 2 sheets of Disney-themed paper both 1” larger than the notebook (height) by the width of the notebook for the front and back covers. (Example: If the notebook is 9.75” high x 7.5” wide, the paper’s cut size will be 10.75” high x 7.5” wide.)
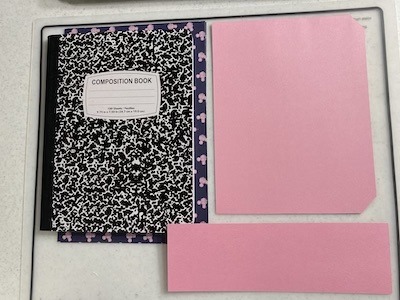
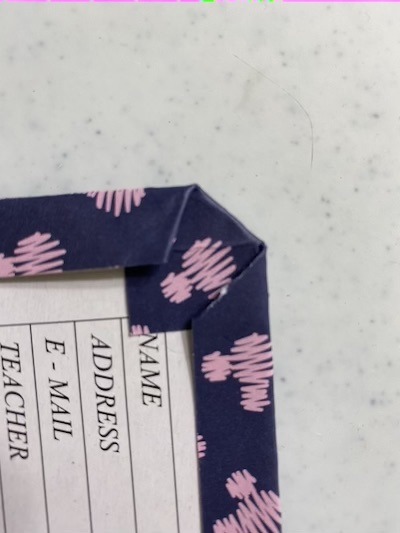
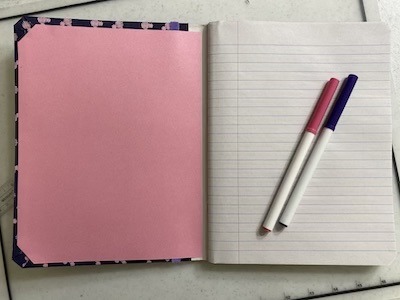
- Trim 2 sheets of the coordinating plain paper 0.5” smaller (height and width) than the notebook for the inside front and inside back covers. (Using the example in Step #2, the paper’s cut size will be 9.25” high x 7” wide). Optional: Cut a small angle at the top and bottom corner on one side of each sheet (see photo below).
- Next, cut the remaining sheet of coordinating plain paper sheet approximately 3” wide by the height of the notebook for the spine cover. (Using the example in Step #2, the size of the spine cover will be 9.75” high x 3” wide).
Fold Paper
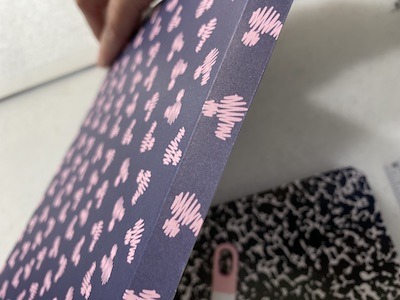
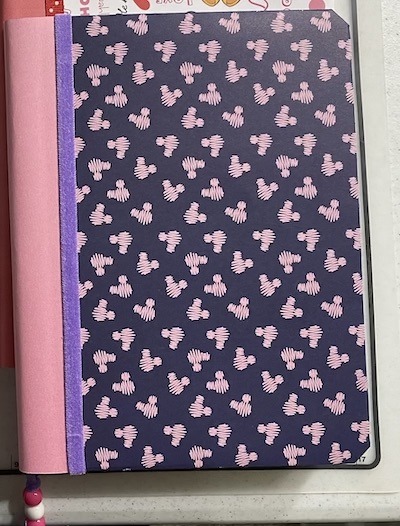
- Fold one sheet of the Disney-themed paper around the top, bottom, and right sides of the front cover of the notebook (approximately .5” on each of the three sides). Note: There is no fold on the left side of the paper.
- Next, fold the remaining sheet of Disney-themed paper around the top, bottom, and left sides of the back cover of the notebook (approximately .5” on each of the three sides). Note: There is no fold on the right side of the paper.
- Attach/glue the Disney-themed paper to the front and back covers.
- TIPS: a) It may be helpful to lightly score the paper using a scoring tool or blunt object that will not tear the paper to keep the fold straight. b) To make nice folds around the corners, first fold the corner of the paper toward the notebook corner, then fold the straight edges around the corner (see photo below).
Add Bookmark and Cover Spine
- Cut 2 pieces of ribbon at least 1” longer than the height of the notebook. (Using the example in Step #2, cut two (2) 12” pieces of ribbon. Note: The notebook’s bookmark uses the remaining ribbon, approximately 17”-18”.
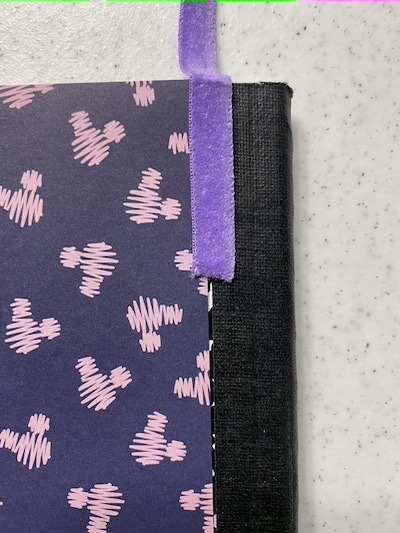
- For the bookmark, attach approximately 1” of the ribbon to the back cover. Indent the ribbon placement about 1” from the top right side (see photo below). Bring the ribbon around the top of the notebook and insert it into the inside left of the notebook as if marking a place in the notebook. Note: The spine cover hides the ribbon when attached in Step #11.
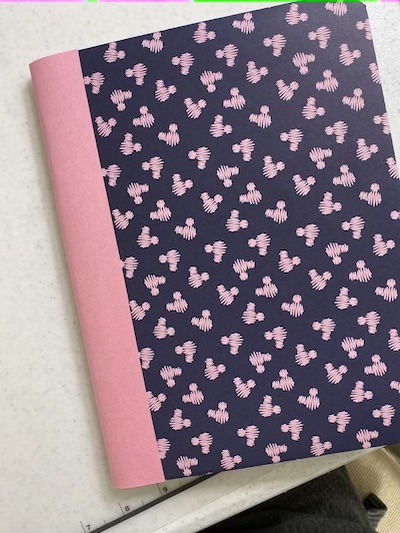
- Fold the spine cover around the spine of the notebook and attach it in place with the adhesive, tape, or glue stick.
Attach Ribbon, Inside Covers, and Bookmark Accessory
- Attach 1 of the 2 remaining ribbon pieces to the border of the spine cover on the front of the notebook. Wrap about 1” of the ribbon around the top and bottom of the notebook cover.
- Repeat Step #12 to attach the remaining ribbon on the back cover bordering the spine cover. Note: The ribbon attached to the inside of each cover will be hidden by the inside covers that are applied in Step #14.
- Next, attach one of the coordinating plain paper sheets to the inside front cover and the other to the inside back cover. Overlap the Disney-themed paper that was folded over the inside edges.
- Optional: Attach, knot, and/or tie an accessory to the end of the bookmark (e.g., beads, decorative buttons, etc.)
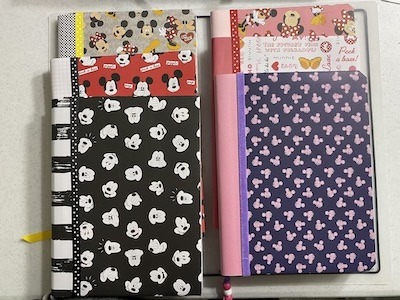
Hope you find this do-it-yourself Disney-themed notebook to be a fun project. I know I enjoy making them for myself, and made several of them as gifts during the holiday season. The recipients all shared positive feedback.
If you are interested in more Disney-related crafts, check out some other ideas on The Mouse For Less Blog.
Do you use a travel journal or customized notebook for your Disney vacation planning? Have you created a Disney-themed notebook? Let us know in the comments, or on Facebook or Twitter!
Did you like this article? Make sure to share it with your friends! Check below for easy ways to share!
Want to visit the Walt Disney World Resort? Contact The Magic for Less Travel for more information and a free, no-obligation quote.
Incoming search terms:
- https://www themouseforless com/blog_world/do-it-yourself-disney-notebooks/
