Getting your MagicBands in the mail before a trip to Walt Disney World is such a fun thing because it means that your vacation is just around the corner.
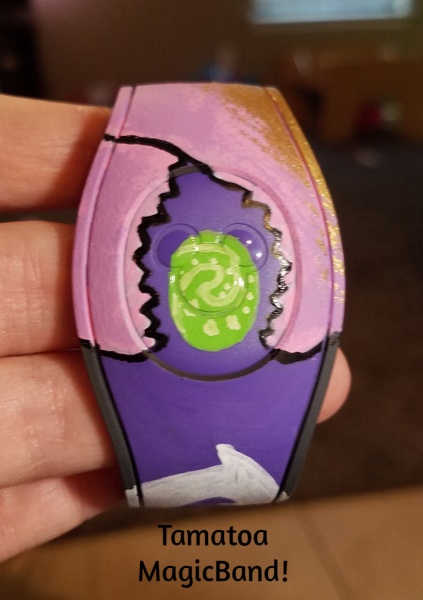
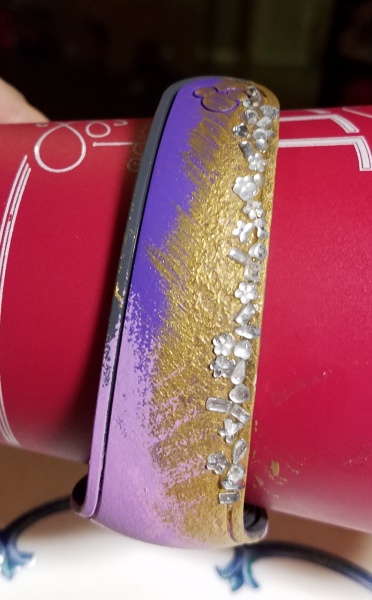
Decorating your bands is a great way to keep getting excited for your trip while you are waiting for the day of your vacation to arrive. Even if you don’t think of yourself as an artist, you can still make a great, custom-made band. For our most recent trip, I decided to do a Tamatoa theme. The end result looked impressive, but it is really quite simple to do.
To replicate this Tamatoa look, you’ll need gold, pink, and purple acrylic paint, a small paint brush, nail polish pens in black, white and green, rhinestones, super glue, clear nail polish, a pencil, and a sponge.
Before you start, you will want to fasten your band around a round object, such as a skinny rolling pin or a drinking glass. If you decorate your band while it’s flat, the paint will crack when it dries and you then try to bend it around your wrist. Leave your band fastened around your round object for the entire decorating process.
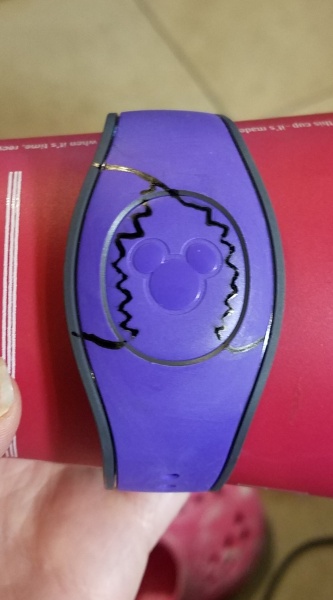
The first step is to lightly draw the crab claw on your band using your pencil. I made mine so that the claw was “closing” around the Mickey head in the center of my band. After I was happy with the shape of the claw, I drew over the pencil with my black nail polish pen.
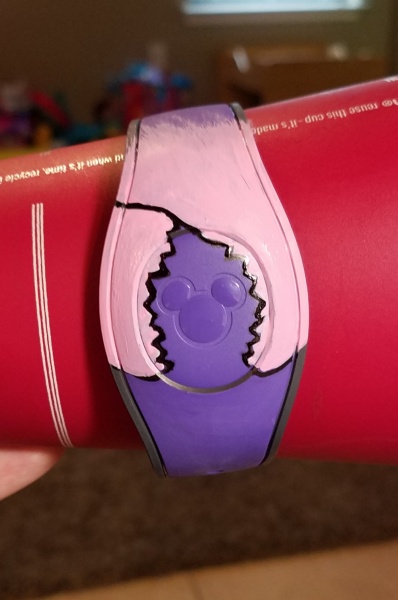
Next, I used my paint brush to fill in the claws with pink paint. I started with the tips of the claws and moved back toward the end of the band, and once I got to about the part where the band starts to curve around my wrist, I just lightly brushed the paint around the curve to give it a slight fade effect. I did not paint the pink all the way to the end of the band, but that was mainly because I really liked the purple of my band showing through. Once the pink paint was dry, I then used the sponge to lightly dab a little light purple paint over the top of the pink to give it some extra depth.
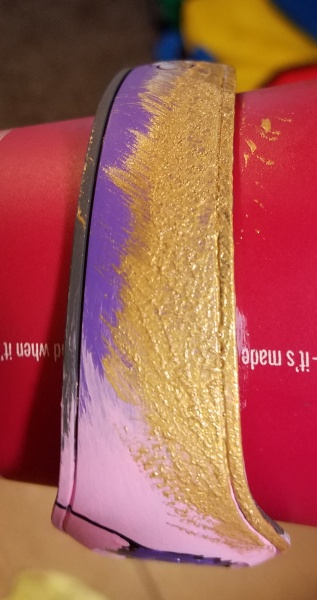
When the pink and purple paint is totally dry, take your sponge and dip it in your metallic gold paint. Dab it on the upper edge of your band starting just about in the middle of the upper claw and moving toward the back end of your band, letting the paint create a thick and textured appearance. You want the paint to be rough and bumpy to imitate Tamatoa’s shell. I then used a dry paint brush to lightly brush down some of the gold paint to help bring some streaks of paint down toward the bottom edge of the band.
Next, once the gold paint was totally dry, I used super glue to add a few small rhinestones along the upper edge of the band, adding extra dimension and shine. I purchased a set of nail jewels from Amazon because I wanted the stones to be small, but you can choose whatever size you think looks best. I strongly recommend you give the rhinestones and gold paint several coats of clear nail polish when the paint and super glue are totally dry. This helps seal the stones on and makes them less likely to pop off when you inevitably brush up against something with your wrist.
Finally, I used the green and white nail polish pens to draw the Heart of Te Fiti on the Mickey Head. There’s still plenty of room on the other side of the band if you want to add something else, like Maui’s hook, a name, or more rhinestones.
Decorating your MagicBand can add a fun flair to your Disney vacation. With these steps, for making a Tamatoa themed MagicBand, it’s very easy for you to get a nice looking band even if you don’t think of yourself as an artist.
How have you decorated your MagicBands? Share in the comments, or on Facebook or Twitter.
Did you like this article? Make sure to share it with your friends! Check below for easy ways to share!
Incoming search terms:
- making tamatoa out of newspaper
